How To Defrost Your Freezer
How To Defrost Your Freezer
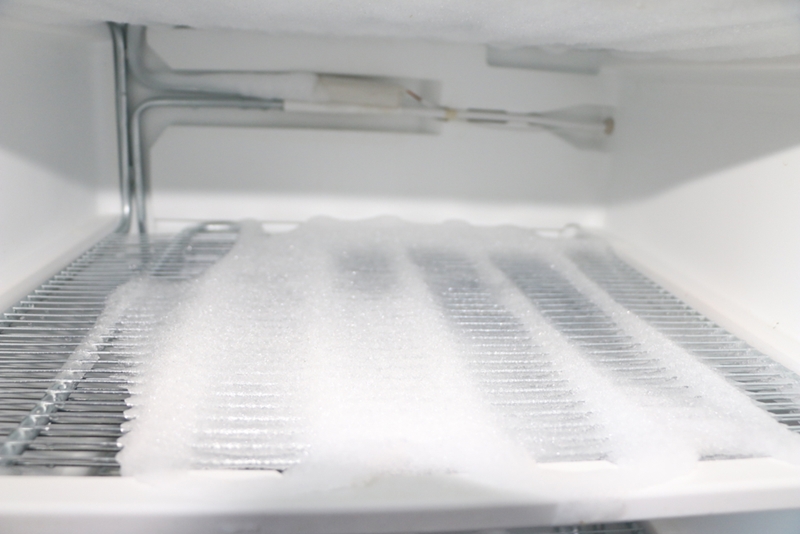
Frost can build up in your freezer and be a nuisance to you. It a lower your amount of storage capacity available and seize up your removable drawers, restricting your access to your frozen foods. Many new freezers come with frost free technology which means that frost is less likely to build up on the interior. However, if you don’t have a freezer with frost free technology, you will need to manually defrost it. Read our guide below on how to defrost your freezer so that you don’t waste time or make a large amount of mess. Similarly, check out Powerpoint Wallasey’s range of frost free freezers here to save you the hassle of defrosting!

How to Defrost Your Freezer Easily
You will find a lot of how to defrost your freezer guide online that have ‘the best method’ that include lots of complicated steps. However, some methods will often leave you spending more time defrosting it and can even invalidate your warranty due to the removal of parts and potentially damaging your freezer in the process.
Here is Powerpoint Wallasey’s freezer defrosting guide in 10 simple to follow steps:
Switch your freezer off both on the kitchen appliance itself and at the mains.
Clear the surrounding area. You need the surrounding area to the freezer and clear as possible to prevent any water from getting to your other appliances or cupboards. You can then lay down newspapers or towels on the cleared area. This will soak up any water that leaks from your freezer as the ice defrosts inside. The newspapers will need to be replaced frequently, and the towels will need to be wrung out frequently also to allow them to continue to soak up water.
Remove your food from inside. You can then empty your freezer completely by taking out your foods from inside. When doing this, ensure that you prioritise fridge space to meats and dairy items as these have a higher risk of bacteria. If you are short on fridge space, you can also use a cool box or even ask a neighbour or family member to store your foods inside their freezer whilst yours defrost. The sooner that you remove your foods, the safer they will be to eat in the future.
Remove drawers and shelves. If your freezer has removable or adjustable shelves or drawers, you should remove these to speed up the defrosting process. If they are frozen to the interior walls, don’t try to remove them with other objects, leave them until the freezer has defrosted slightly and you are able to remove them easily. If, when you remove them, they have ice attached to them still, simply place them in your sink or bath so that the ice won’t defrost and cause a mess
Some modern freezers now come with a drainage hose or a tray at the bottom, underneath it. If your freezer has this, make sure that you set these up beforehand so that you are ready for the ice to begin melting straight away.
You must now wait. Depending on the warmth in your home or room and the amount of ice that has built up on the interior will determine the time that it takes to defrost. You may see people ‘recommend’ using a hair dryer, heat gun, pouring hot water on it or even using a knife to cut chunks of ice off! You should not follow these guides as all of those methods are potentially dangerous and could cause serious harm to yourself and even damage your freezer. You do have to be patient at this point, ensuring to keep an eye on your towels and newspapers; replacing and wringing them out when necessary, plus removing any remaining shelves from the interior.
Use your time. During your waiting time, you can take a cloth to the interior to give it a thorough clean, removing any dirt or loose pieces of food that remains on the interior. Common places that dirt tends to invade is the seals and the edges of the walls.
Drying. Once you are happy that all the ice has defrosted from the interior of your freezer, you are ready to dry the interior. Take a clean and dry cloth and wipe the entire interior surfaces to dry them and remove any remaining dirt or ice. This will prevent any bacteria from being stored in the freezer plus prevent the immediate buildup of ice when you turn your freezer back on.
Switch it back on. You are now ready to switch your freezer back on. You must make sure to turn the appliance back on using the appliance switches as well as at the mains. It won’t be cold immediately after switching it back on so hold off refilling it with your foods just yet. Your freezer can take a couple of hours to reach your desired cooling temperature.
Add your foods back in. Once your freezer has reached your desired temperature, you can refill it with your foods. As a general health tip, don’t refreeze foods that have defrosted as they may have bacteria inside.

This whole process should take around a day to complete, start to finish, depending on the amount of frost and ice that you have had built up on the inside of your freezer.
We hope that our freezer defrosting guide helps you out and makes your whole freezer defrosting process less stressful and easier to complete. If you’re interested in completely skipping freezer defrosting, a frost free freezer Liverpool or even an auto defrosting freezer may be up your street and worth purchasing.
Here at Powerpoint Wallasey, we are an experienced and trusted kitchen appliance retailer. Our wide range of appliances includes a huge variety of freezers for you to choose from. It includes big name brands such as Lec, Smeg, Bosch and Fridgemaster. We also pride ourselves on making our freezers available at unbeatable prices. Contact us today to learn more about our range of freezers on 0151 630 2593 or check out our range of freezers online here.
Looking for a fridge? Browse our stock now.


